
*This post contains affiliate links.
Use of the affiliate links is hugely appreciated and is a great way to support my blog. I love knowing my reviews are being put to good use!*
If you don't already know, I suffer from hormonal cystic acne. This means I get huge red angry spots, mainly around my chin and jaw area. Most are deep under the skin but some form into whiteheads (yuk) and all of them leave being red pigmentation marks that take forever to fade! I've been having issues with it since I was 17 years old but it's only in this last year or so that I've learnt how to hide it.
First of all, you need the right products. You don't need a super high coverage foundation (unless you want one!), it's all about the concealer. Now this will need to be fairly high coverage. The type is personal preference really but usually you're better with a pot style concealer, rather than a liquid. However both can work well.
My personal favourites are Trinny London Just a Touch Concealer (available in 14 shades from HERE) and Nars Creamy Radiant Concealer (available in 30 shades from Space NK, Cult Beauty, Look Fantastic UK and USA and Nars.com). This needs to be a perfect match to your skin tone. Nothing draws attention to spots more than them being a shade lighter or darker that the rest of your face.

The second essential products are 2 clean makeup brushes - one for concealer, one for powder. You can't go wrong with Real Techniques brushes in my opinion (available from Boots). They're soft, fluffy and great value! As always make sure you keep your makeup brushes clean by washing them regularly. This is especially important if you suffer from acne as you can make it worse as dirty brushes harbour bacteria, which in turn cause spots. I wash mine using baby shampoo.


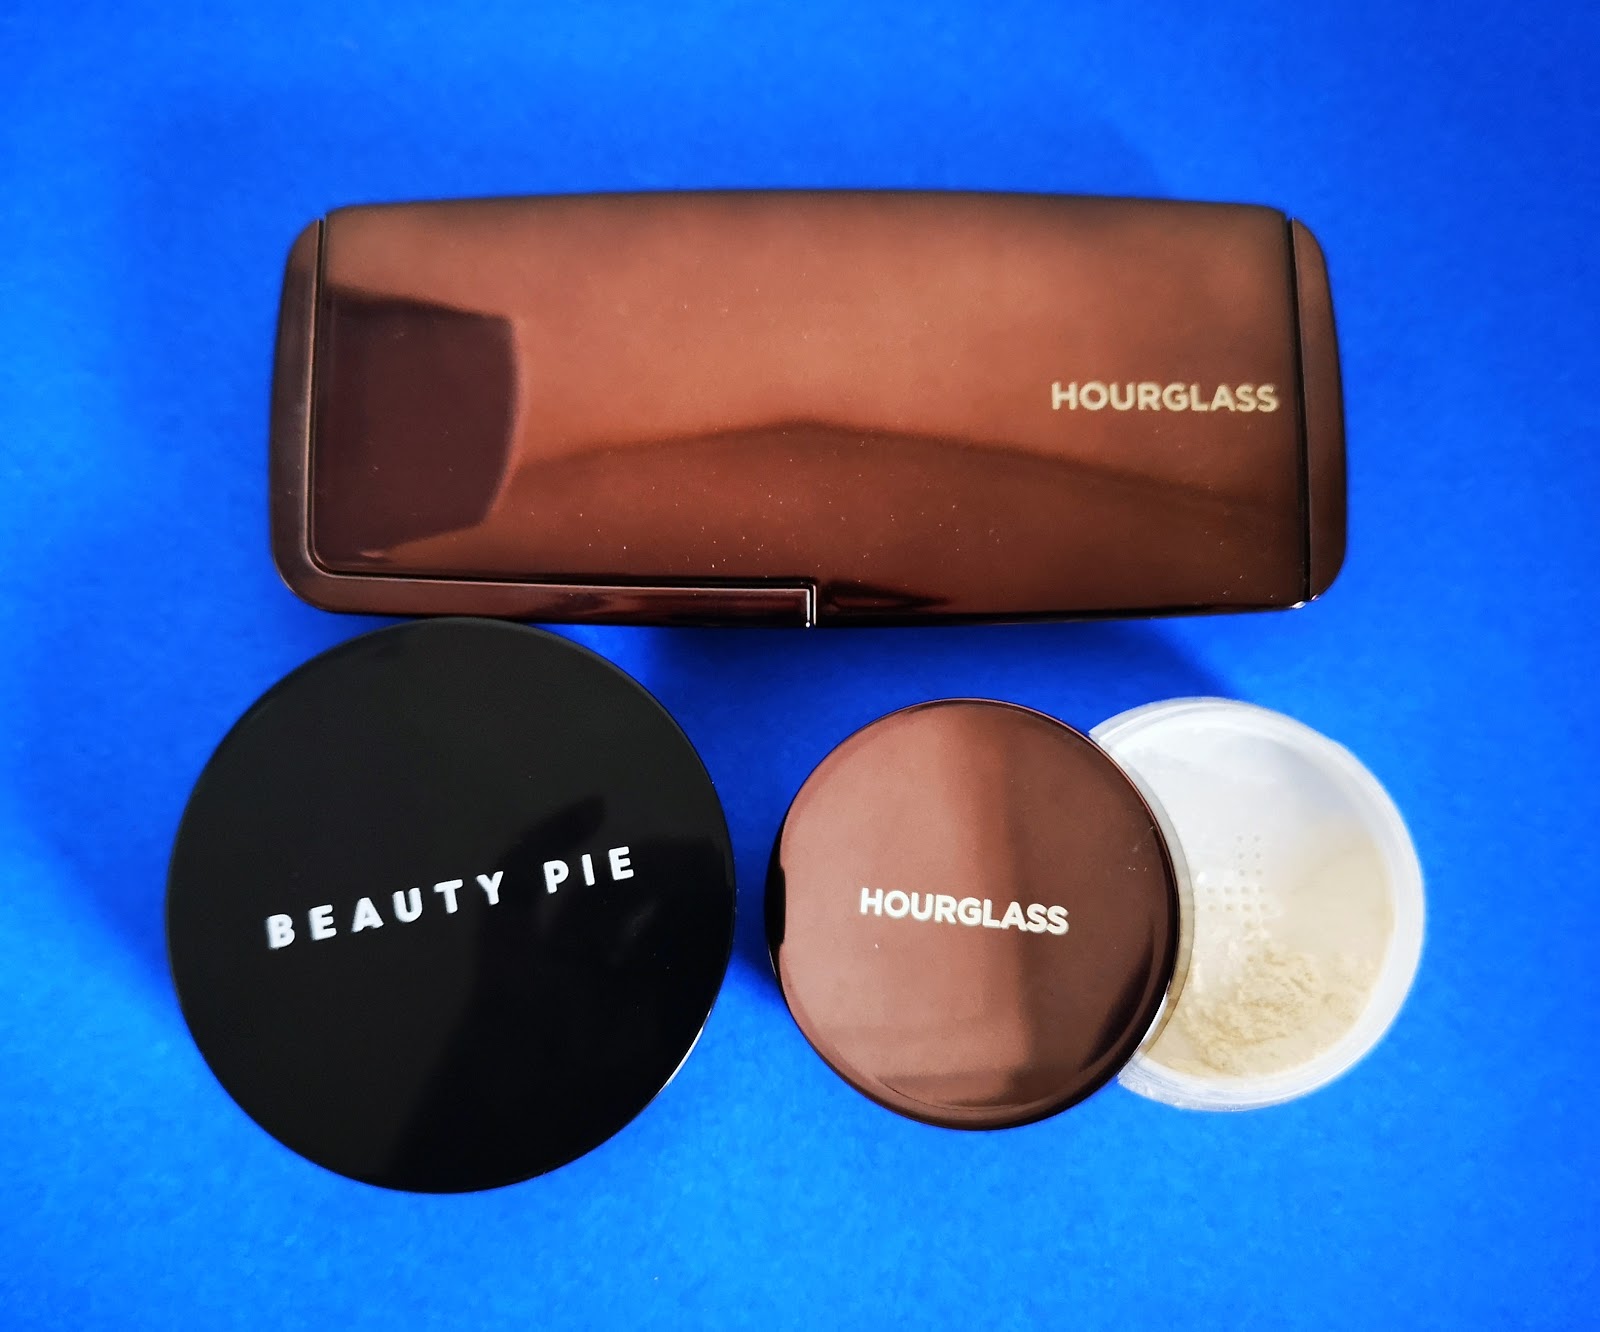
The third must have product is a setting powder. This needs to be as finely milled as possible to avoid caking. My favourites are Hourglass Ambient Lighting Powder (available in 7 shades from Space NK and Cult Beauty), Hourglass Veil Translucent Setting Powder (available in one shade from Space NK and Cult Beauty) and Beauty Pie One Powder Wonder (available in one shade HERE).

The fourth product that I'd recommend is a colour correcting product in green. Don't be scared to use a green product, if used correctly, you won't end up looking like the Hulk! Green is perfect to counteract redness. It's not an essential though but it definitely helps. I've had best results with a green primer rather than green concealer. I'd recommend Touch in Sol Dark Out Primer in green (available from MMCL London, Debenhams and from May, Boots!) or Erborian CC Red Correct (available from Space NK).


And last but not least, you'll need a foundation, BB / CC cream, tinted moisturiser or whatever you prefer. This is also not an essential product, believe it on not! You'll see why soon!


Now onto the technique! It's all about the technique. I first learnt this after reading The Makeup Manual by Lisa Potter-Dixon. It's a brilliant book, that I highly recommend! It's full of amazing makeup tips. I've also seen a variation of this technique used recently by @bambidoesbeauty who calls it micro-concealing.
So how do we do it?
Step 1 - Prep your skin as normal for applying makeup. By this I mean, make sure your face is clean and preferably moisturised.
 |
| Clean face with spots and acne pigmentation! |
Step 2 - If you are using a colour correcting green primer, apply this now. This should help neutralise redness. If not, move on to step 3.
Step 3 - If you are using a base (foundation / BB cream etc) apply this now. Apply a thin layer, don't cake it on, this will only highlight your spots! Ensure it's blended in well. If you're not using a base, move on to the next step.
 |
| Foundation applied - spots still visible |
Step 4 - Now this is where the important stuff happens! Using clean, washed hands (so you don't spread bacteria) apply your concealer on to your spots. Do this by gently dabbing it on to the spot so it covers it and just around it completely. I like to use my fingers to apply the concealer for a number of reasons - it's easy to make sure your hands are clean, you can control the amount applied well and the heat from your fingers helps melt the concealer into your skin.
 |
| Apply concealer using clean fingers |
Step 5 - Take your concealer brush and very gently buff and blend the edges of your concealer. Because you're using fingers and a small brush, you can be precise and keep the concealer just on the area that you need it. This is why you can go without foundation if you don't want to (a la @bambidoesbeauty). You're focusing just on the problem areas! Blend until you can't make out where the concealer and skin meet.
 |
| Blend, blend, blend! |
Step 6 - As you're working with such a small area, it's likely that you've uncovered some of your blemish again whilst blending. Don't panic, it happens! Just repeat step 4, adding back a bit of concealer. You probably won't need as much this time. Then repeat step 5. Hopefully now you should be happy with how your spots are covered.
Step 7 - The final step and it's an important one! You must set the concealer so all your hard blending work stays in place. Take your second, clean brush and take the smallest amount of powder and press it very, very gently onto the concealed spots. I suggest using a clean brush because if you use the brush that has concealer on it, the powder can clump up and stick to the concealer. This then makes it hard to apply. This doesn't happen with a clean brush. I find gently dabbing / pressing it onto the area works best as it disturbs the concealer the least. If you brush it on, you risk wiping off your concealer!
 |
| Carefully set with powder. |
And that's it! I'd usually use a setting spray too but that's purely optional. I hope I've managed to teach you all something new - let me know if you try this technique out! All the products I've recommended are linked.
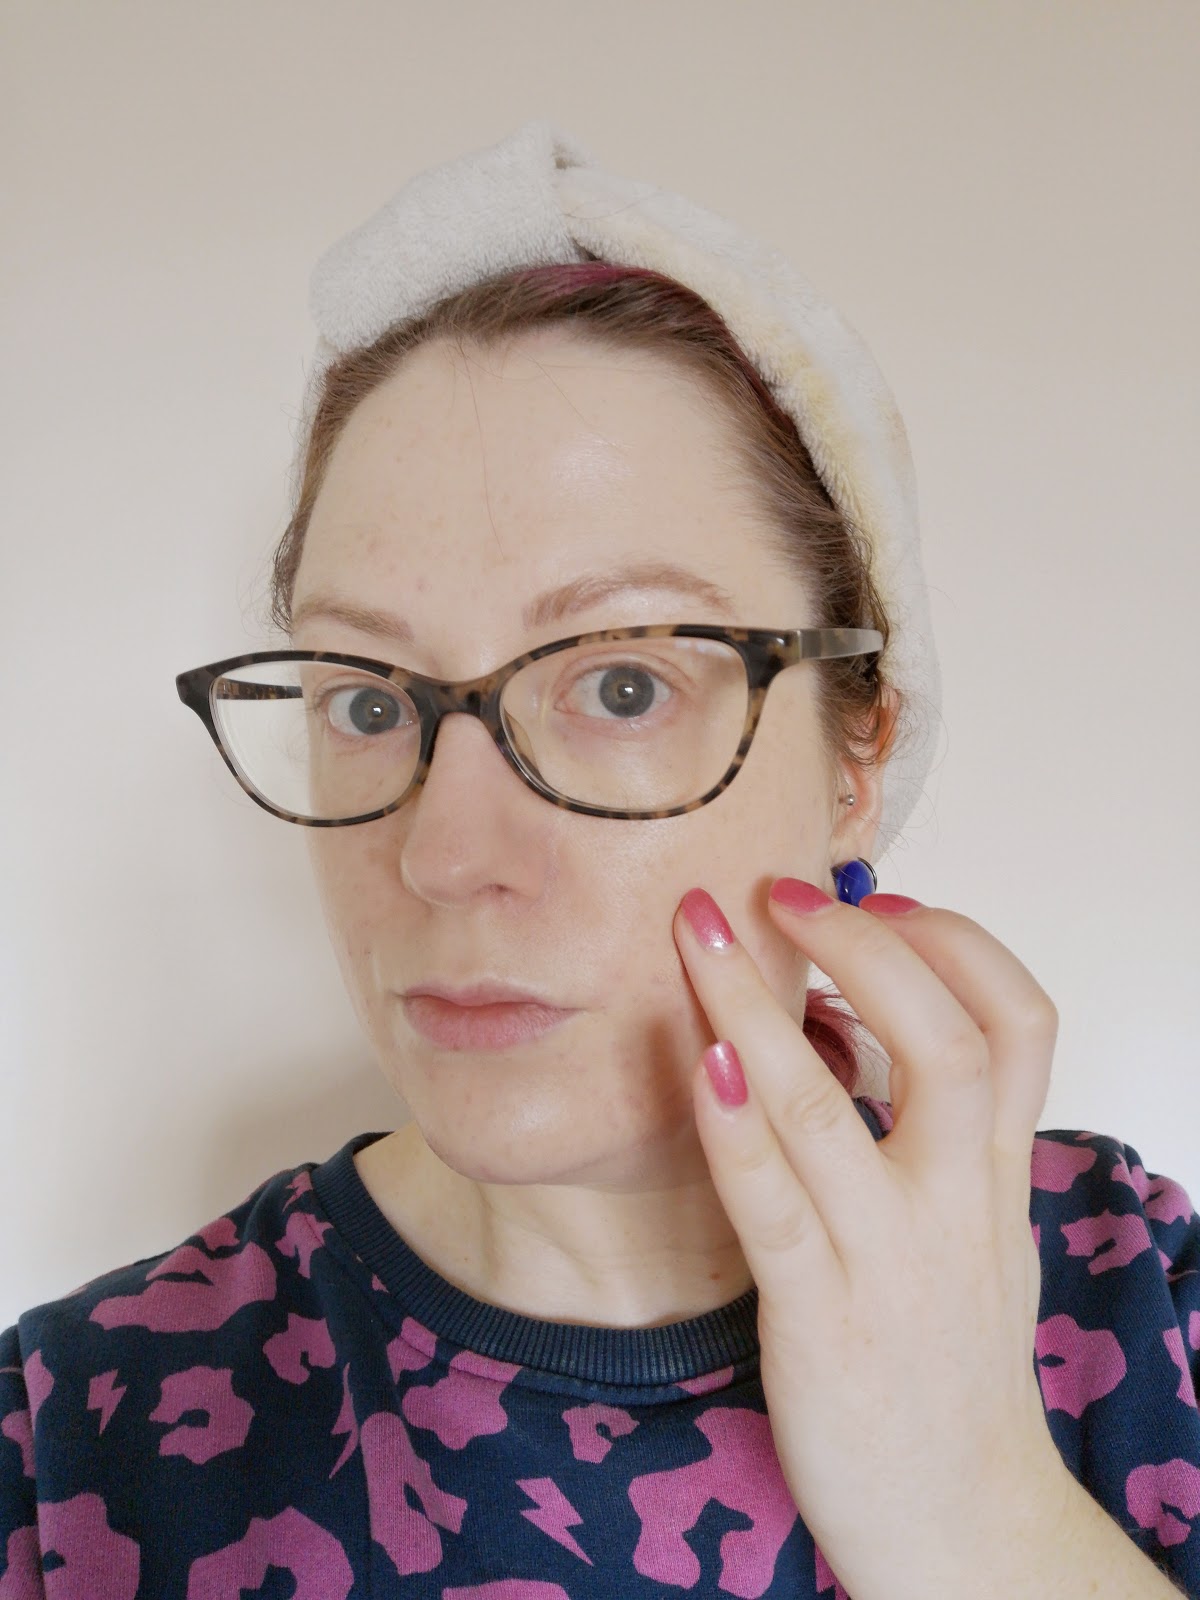
 |
| Completed look - no visible spots! Acne? What acne?! |
No comments
Post a Comment