*AD info - PR discount.
I've recently had a course of four sessions of SkinPen Microneedling at my local beauty salon, Beauty At The Gate (website HERE) and thought it was time to share my results! If you've not heard about microneedling before, it's where controlled micro-injuries are caused to the skin using needles, to prompt the skins natural healing process. This in turn produces collagen and elastin in the skin. It's designed to reduce wrinkles and acne scars. It can also help with pigmentation too.
SkinPen uses a cartridge which contains 14 needles. This is disposed of after each use. The needles are super precise and sharp and are all the same length. The length of the needles is adjustable, dependant on the area being treated, to ensure accuracy.
When I had my first session, I'll admit I was initially nervous at the thought of the needles. Sam (BATG owner) put me completely at ease and explained the entire process thoroughly, so I knew exactly what was going on. After cleansing my face, Sam applied a numbing cream which is left on for about 20 minutes. This completely numbed my skin - it was such an odd feeling! Not unpleasant though. Once numb, the cream is wiped off and the microneedling can begin.
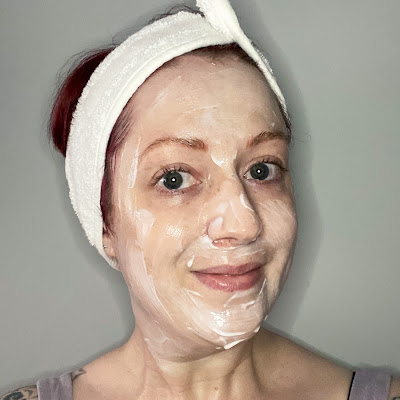 |
| Numbing cream applied |
The SkinPen device reminds me of a tattoo gun (if you've had a tattoo you'll know what I mean). The group of needles vibrates. Sam started by slowly moving the SkinPen device across my face, going up and down, then side to side, before moving on to the next area. It was completely painless thanks to the numbing cream. All I could feel was the vibration of the needles, no discomfort at all.
The needle length is adjusted depending on the area being treated. The majority of my face / neck was 1mm, my cheeks were 1.5mm and my nose and forehead were 0.25mm. It's so funny when it goes over the nose area as the vibration tickles! Sam then did a second pass over my problem areas on my cheeks / chin where I've got acne scars. Once complete, a specifically designed soothing cream is applied. And that's it! The whole process takes about an hour. I was so surprised that I didn't feel a thing! It definitely looks worse than it is.
 |
| During SkinPen treament |
As the numbing cream wore off, my skin started to feel warm and slightly tight, a bit like mild sunburn. There was some redness too. This is totally normal.
 |
| Immediately after SkinPen treament |
The aftercare process is fairly simple. The micro-injuries caused remain open for approx. 24 hours so it's imperative to keep skin clean during that time. I avoided touching my face unless I'd just washed my hands and I also put a clean pillowcase on, as they can harbour bacteria.
I was provided with specifically designed skincare to apply for the first couple of days, after gently cleansing. Lift is a lightweight cooling gel and Rescue is a slightly thicker gel/cream. I re-applied the skincare throughout the day whenever my skin felt a bit tight, along with SPF of course! I found that doing this helped to reduce any peeling and redness.
 |
| SkinPen aftercare |
After a day or two, I switched back to my own skincare, sticking to lightweight, hydrating and soothing products. Again, I found by reapplying skincare during the day really helped the healing processed. I avoided any actives (acids, retinol etc) for a week before and the week after treatment. I also didn't apply any makeup for a couple of days after. I found that I usually had a bit of peeling during the first couple of days.
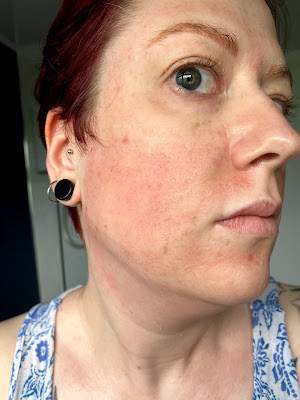 |
| Slight peeling / redness |
After that it was just slight redness which was easily covered with makeup if needed. My skin was pretty much back to normal after a week. I definitely needed to have a day or two where I worked from home after the treatment, just so I could be makeup free and reapply skincare when needed.
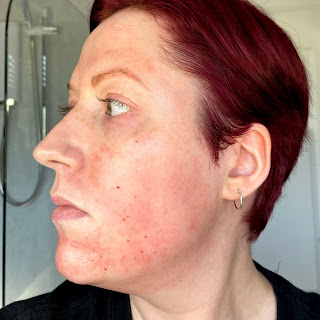 |
| Day after |
 |
| Day 3 |
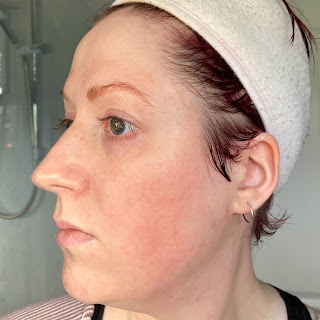 |
| Day 5 |
 |
| Top is before, bottom is after |
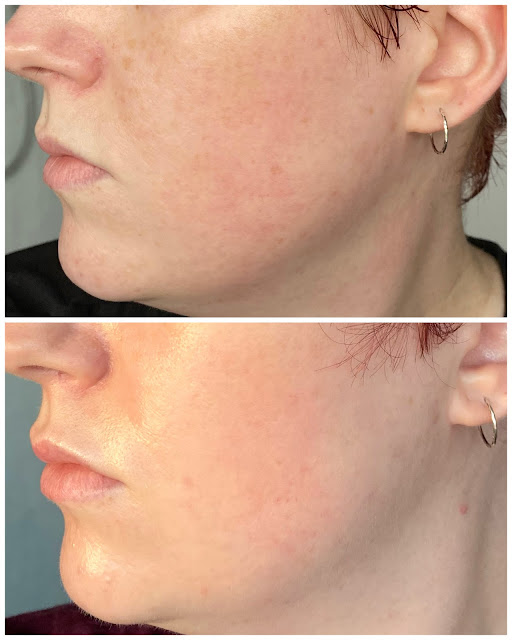 |
| Top is before, bottom is after |
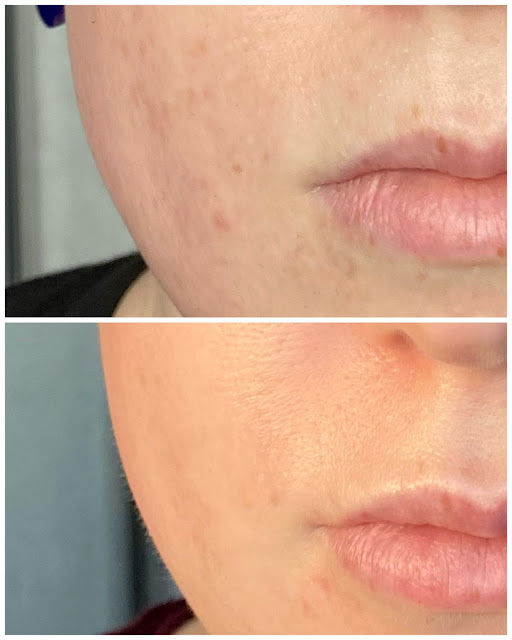 |
| Top is before, bottom is after |

This comment has been removed by the author.
ReplyDelete
ReplyDeleteThe SkinPen Microneedling review highlights impressive improvements in acne scars and overall skin texture. For those looking for the best acne scar treatment, Acne Scar Center offers specialized treatments that go beyond microneedling to ensure smoother, more even skin. Their professional approach to acne scar removal can enhance results and help you maintain glowing skin. It's an excellent way to restore confidence and achieve a clearer complexion
What a fantastic, detailed breakdown—your journey with SkinPen microneedling, from numbing cream to stunning before-and-after results, really shows how effective controlled collagen stimulation can be for reducing texture and acne scars! For those now wondering about acne scar removal cost, the Acne Scar Center offers clear, customized pricing and advanced treatment plans tailored to your needs. Their personalized approach can build on the great results you’ve already seen—helping you keep your skin smooth, confident, and radiant.
ReplyDelete